Wednesday, 2 April 2014

Summer wishes card

As soon as I saw lulupu's summer themed card challenge my mind was filled with so many different ideas... I Have not tried CAS cards yet. So I really wanted to make something the same day. The first card I made was with watermelon and " Enjoy each slice of this summer" sentiment. But it looked simple and empty so came up with this beach theme which is my friend mythili's idea.


Beach, A perfect place to spend our vacation in summer. So thought it would match the challenge very well .

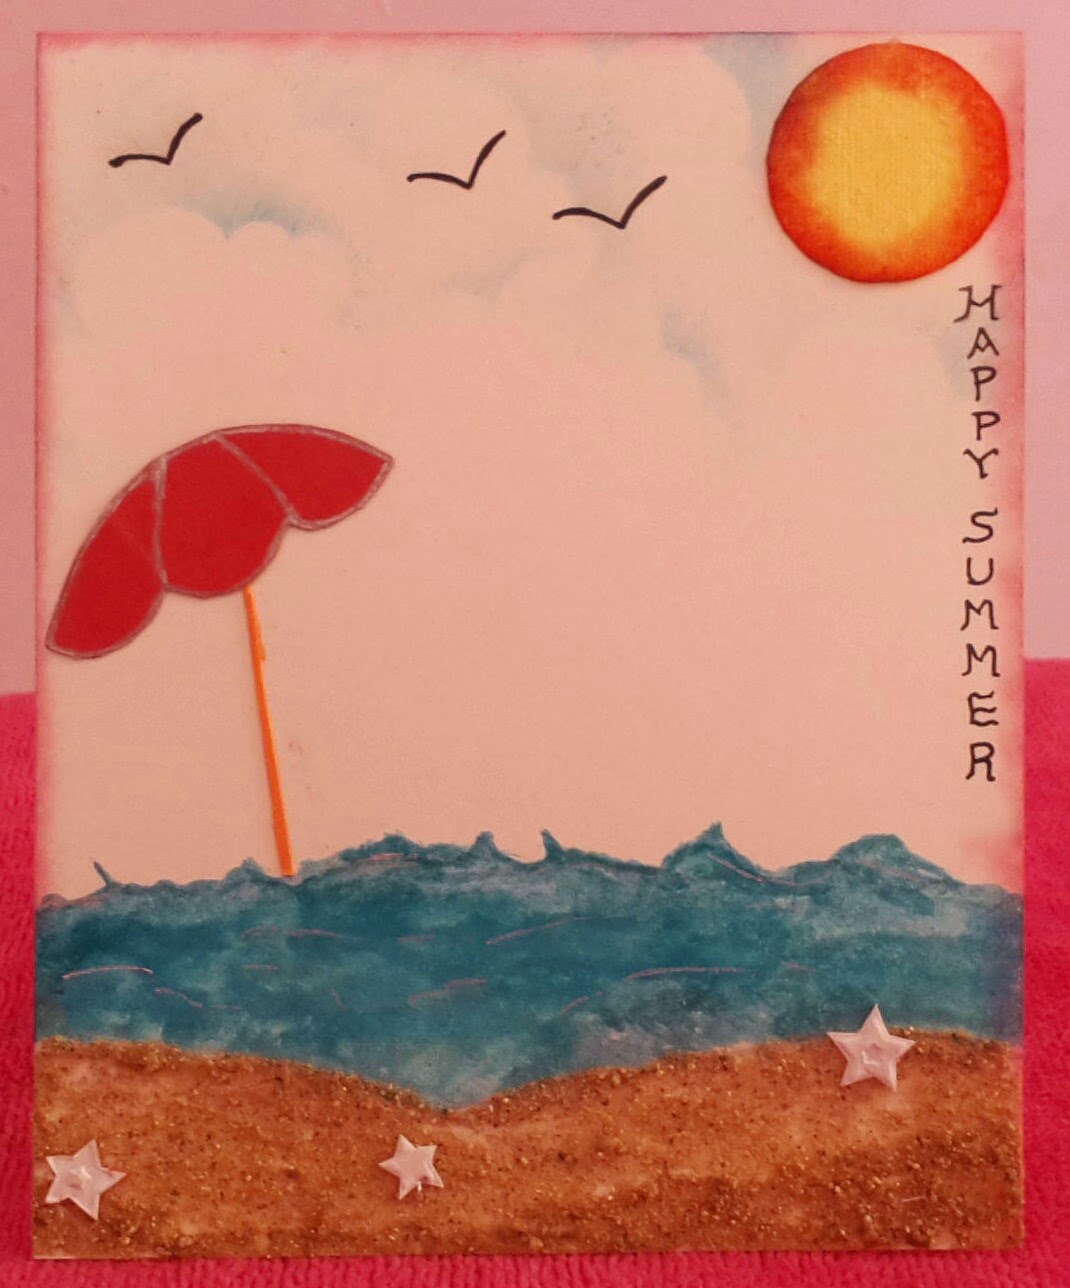
Planned to use real sand for beach sand and used peacock feather distress ink to color the beach. I know water looks clumpsy, am not really that good in using distress inks. It will take years  for me to master I think :(

Used some embossed stars as starfish. Thought Sun ,clouds and umbrella will make the perfect scene. And my card is done :) :)


Linking this to lulupu challenge-28-cas-cards 

Sunday, 30 March 2014

Card for a baby girl

I made this card especially for itsy bitsy's precious baby challenge. Babies are the most wonderful thing in this world. I love babies especially baby girl. So decided to make this one for a girl baby with pink and white color which is the favorite color of girls.


Luckily I had a patterned paper with girl baby theme with me. Wanted to incorporate footstep concept ( dad's , mom's and little one's) in my card but I did not have any die cuts or punches for that. So I had drawn and cut those with the help of scissors. Again it looked so plain so heat embossed it with pink embossing powder. And the sentiment was also handwritten. And finally for decoration purpose I added some roses, pearls,ribbon and swirls.


Materials used
1. White , pink cardtock
2. Patterned paper from itsy bitsy
3. Embossing folder
4. Hydrangea die for roses from itsy bitsy
5. Sizzlits swirly die

Linking this card to
 the-itsybitsy-precious-baby-challene .

 lulupu's second birthday challenge
 
             C - cardstock
             P - patterned paper,pink,pearls
             L - layers

    imagination-crafts challenge anything goes

http://papertakeweekly.blogspot.in/2014/04/anything-goes.html

Tuesday, 11 March 2014

Surprise pop up card

I love to create interactive cards with various techniques. I wanted to try a pop up card so I started searching some easy tutorials and got one HERE.

The reason why I like to make interactive card is,you don't need any special dies, decorative punches or embellishments. With card stock,scissors or craft knife you can create a wonderful card and surprise your friends.


Recently I bought a medallion four die and wanted to use it somewhere in my card. You can see it in the left side of the card. And the triangles in the right side are scrap from some other project. The flowers in top left corners are handmade without any punches or dies whereas the flowers in the bottom right corner are made with Itsy bitsy hydrangea die. Used inked torn paper at the bottom. And finally my favorite Gorjuss doll stamp.

Card when closed 


And when you pull the ribbon at the top 


Side view


Linking this to challenge 27 lulupu 2nd birthday special(category - cards only)

C - card stock, color pencils
P- patterned paper,pearls ,pop card,peacock feather distress ink
T - torn paper at the bottom
L - layers of cardstock


beyondgrey challenge torn and flowerful used inked torn paper at the bottom of the card

Wednesday, 5 March 2014

Clay Miniature Cake

Tried my hands on baking sorry making a cake with clay after my successful miniature clay food post . I got a huge positive response for that!!! This is a super easy cute cake to be made!!!!

 All you need is
1. Clay
2. Rolling pin
3. Oil colors of your choice

How I made

1. Prepared two balls of clay, one in white and one in pink
2. Rolled out the clay flat and thick
3. Using circle cutter, I had cut two white and two pink clay pieces
4. Then arranged it alternatively
5. Again rolled out the white clay little bit thin and covered the whole cake with it.
Then using a sharp knife cut a piece to show the different layers of cake and decorated it with little roses.


Used sharp pointed tool to create impressions on the sides of the cake. Creating option here is endless. Change the color, shape and decorations to make more attractive cakes.


Sending this to Lulupu 2nd birthday challenge  (Category 3  - everything goes)
C- clay , cake
P- pink color
L- layers of cake

Thursday, 27 February 2014

Miniature clay food

My love towards miniatures started right from my childhood. Most of us would  
have played with the natural clay and created kitchenwares when we were kids. Nowadays we do get different types of clay which inspires us to try new things...

I had used air dry clay which is normally white in color and I mixed oil colors with it to make it colored. I tried making some really easy food stuff with help of YouTube videos and it came out good. So I wanted to share those tutorials here........


As you can see I made waffles,chocochip cookies,macrones,idly (famous south Indian dish) , sunny side up eggs and waffles with ice cream.

Materials needed

1. Air dry clay
2. Oil colors
3. Craft knife
4. Rolling pin
5. Match stick


Waffles 


Take a small ball of clay and tint it with brown oil color

Roll it flat with rolling pin and cut a small square out of it . With match stick make the impression


Waffle cone

Draw a grid pattern in a small piece of clay. This will be our mould  for waffle cone


Sunny side up egg


Tint very small ball of clay with yellow oil color

Spread the white clay as u wish and place the yolk. You can pour clear drying glue over it to get the shiny effect as in original egg

With our imagination we can create infinite little charms like this.


Sunday, 23 February 2014

Wedding dress card

Ever since I saw a dress format card in some blogs , I wanted to try it. But I did not want to simply print the template and cut out. I needed something really different so made some variations and thought of decorating the skirt part with roses. And the roses are all handmade.

Materials used
1. Card stock ( blue,white,silver foil)
2. Distress ink ( for roses)
3. Stamps


beyond Grey- love is in the air challenge I have not used red or pink in the card.
http://craftyourpassionchallenges.blogspot.in
http://craftingfromtheheartchallengeblog.blogspot.in
http://addictedtocardschallenges.blogspot.in
make it Monday challenge
http://abc-challenge.blogspot.co.uk/2014/02/f-is-for-flowers.html
http://tuesdaythrowdown.blogspot.co.uk/2014/02/tuesday-throwdown-184-anything-goes.html

Thursday, 20 February 2014

MAGIC WINDOW CARD

This is actually called as double peek a boo card. Behind every magic there is a trick... If we get to know that we too can do magic!!!! This Super cool interactive card is really not that tough to make.

Materials  used
1. Card stock
2. Sizzix big shot
3. Square dies
4. Stamps to decorate

I actually learned to make this card HERE
A very detailed and easy tutorial. She had used circle punches to create window. But I used square dies to create  window since I don't have that punch . Punches of different shapes and different dies can also be used .


This is how the card looks when closed


And here is the view when opened !!!!!!!
  If you watch the video , you will fall in love with this card and you will try to make it on your own. Try It for sure .

Linking this to Make it Monday challenge